Got Photoshop?
![]() Several years ago I was subjected to a Photoshop proficiency test for a creative agency. Such tests are designed to quickly see if you’ve got the goods, carefully designed to weed out the hackers, demanding skills and technique that can’t be faked. Posers need not apply. You’re provided with source files, along with some instructions.
Several years ago I was subjected to a Photoshop proficiency test for a creative agency. Such tests are designed to quickly see if you’ve got the goods, carefully designed to weed out the hackers, demanding skills and technique that can’t be faked. Posers need not apply. You’re provided with source files, along with some instructions.
In that particular case, I was working on some creepy anime DVD package, and was asked to do something like remove the sword from the subject’s hand, replace it with laser gun, turn the mullet into a mohawk, make it a redhead, give it a neck tattoo, and have a lightning bolt coming out of its ass. I wish I still had those files.
Anyway, here’s another one I just did, which is considerably more tame. It’d make for a good study in Photoshop 201.
First, their instructions:
Directions for Editing Test
Please keep in mind that the images you will be editing are for luxury real estate photography.
1. Download the two scenes – 3 exposures each.
2. Use your Photoshop skills to composite and fix the 3 photos so that the interior is lit, what is outside the windows is lit, and the light is balanced.
3. Remove anything you believe is important to remove.
4. Email the final 2 photos, along with a brief description of the steps you took to get the final photos.
We will contact you after we have taken a look to see what you have done to the photos.
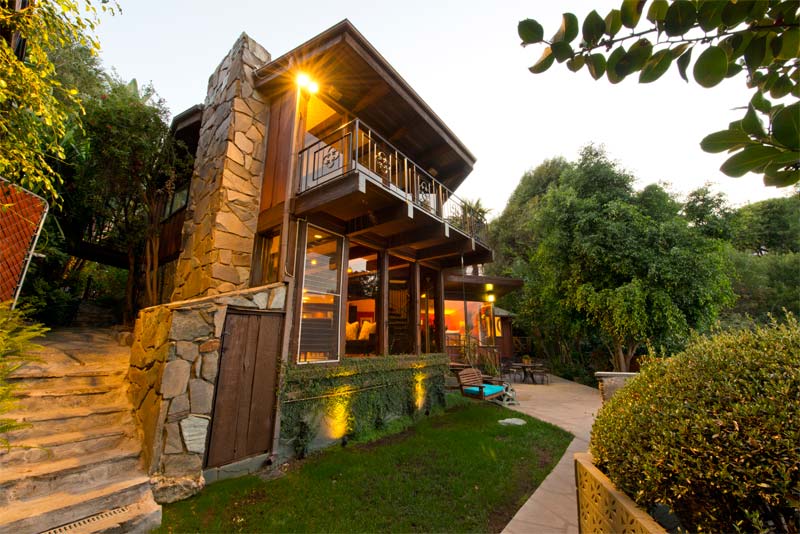
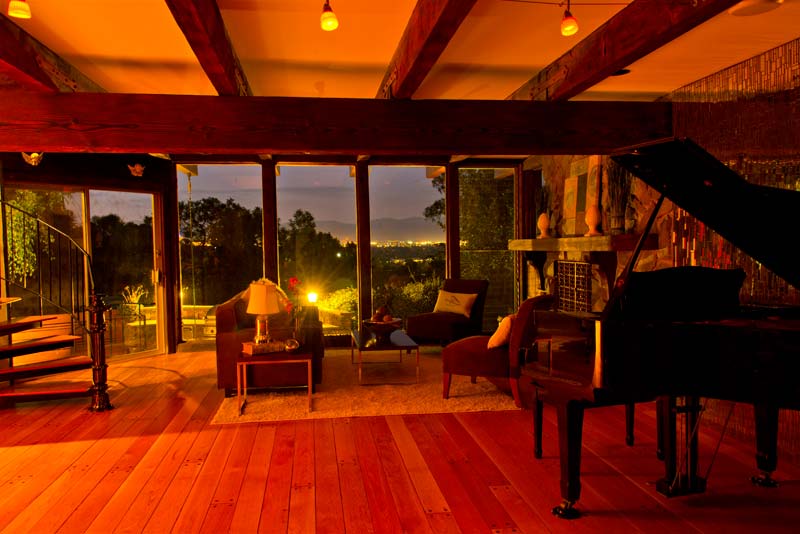
Sounds straightforward enough. First, let’s have a look at their six provided source photos, each of which is unusable as-is. Notice how the warm shots also have glared windows, while the clear-window shots suffer a washed-out foreground. The solution is to composite the good windows with the good foregrounds.
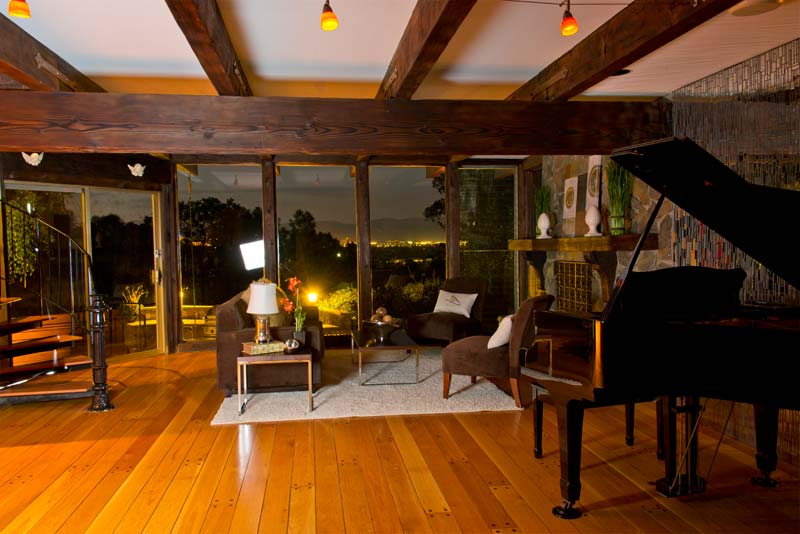
Exterior photo #1. Notice how the balcony window’s glare obstructs the view of the interior ceiling and other details. We’ve also got a problem with that blinding floodlight on the balcony:
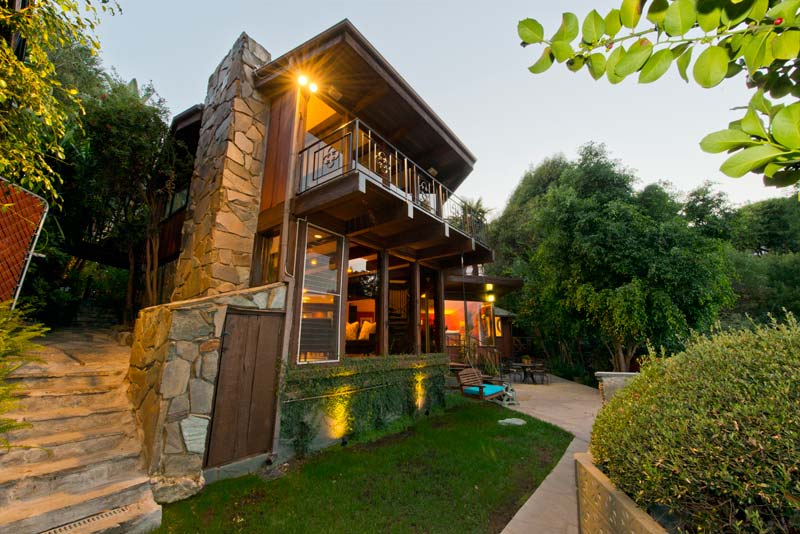
Exterior photo #2. Looks like a variation of #1, with a retouched sky and the leaves at the upper right more apparent. I’ll want to bring those back in the composite using a Gradient Tool in the Layer Mask:
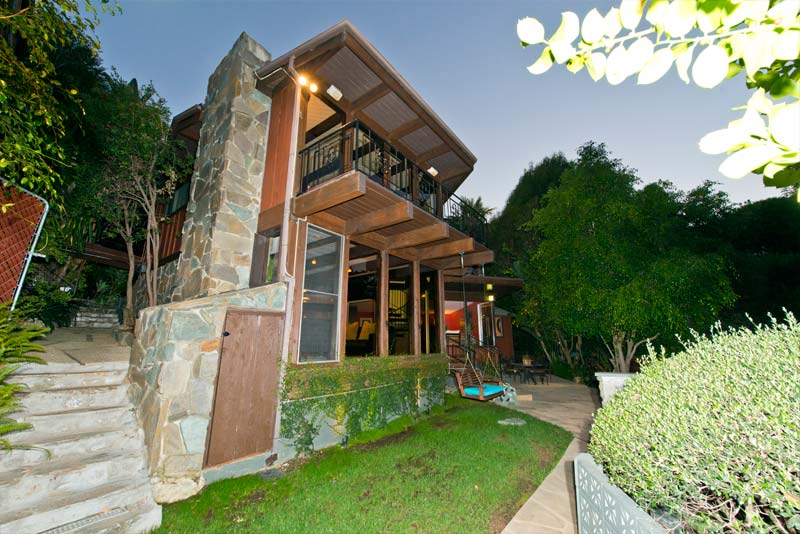
Exterior photo #3. Windows look good. We can now see into the house, but only at the cost of overexposing the exterior:
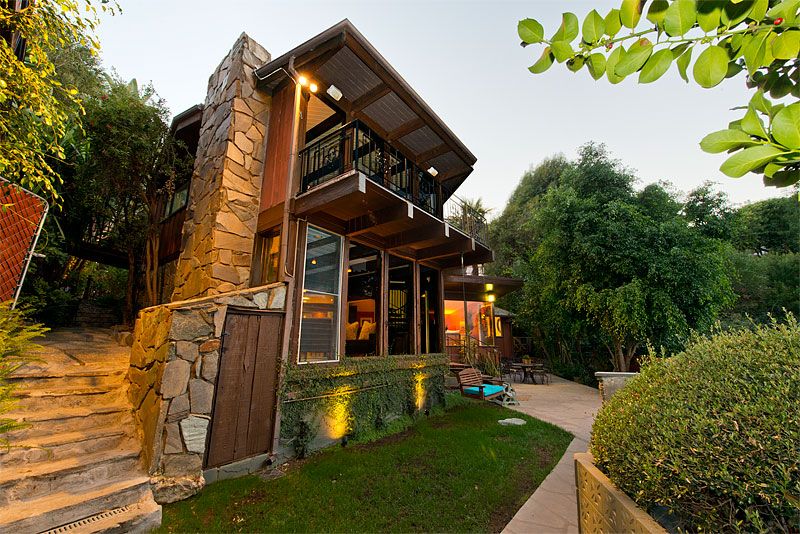
My fix:
Interior photo #1. Two problems here. First we can’t see outside. Second, the foreground is dodged out and heavy on the green:
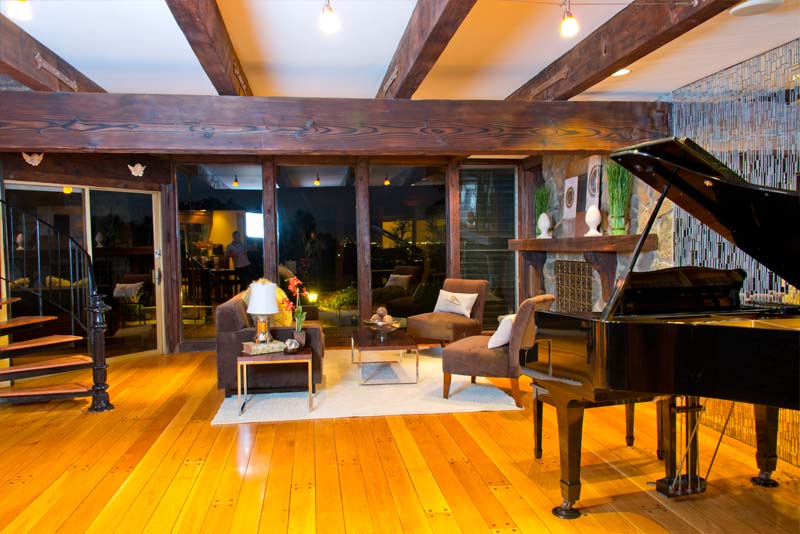
Interior photo #2. Windows are good. We can now see outside, but now the foreground’s too dark:
Interior photo #3. This looks to be a dupe of #2, with the red hue cranked up. I’d have done that myself. Using this red image as a stepping stone, I’ll fix #1’s color problem by plopping #3 on top of it while using the Soft Light Layer Blending Mode at 40% opacity:
My fix:
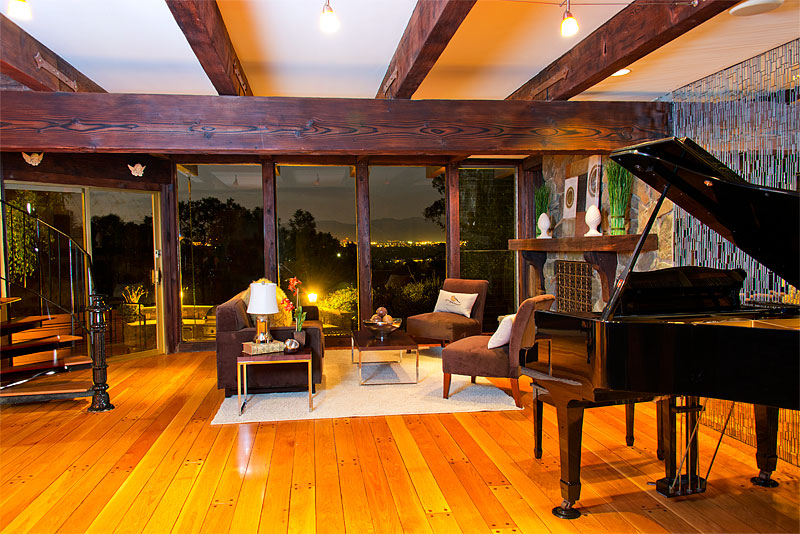
DESCRIPTION OF WORK: Starting with the six provided exposures, both the exterior and interior compositions were created using a combination of Layer Masks, Adjustment Layers, Blending Modes, and other channel operations. Tools used were the Pen Tool, the Rubber Stamp, the Gradient Tool, and Brushes.


Comments on this entry are closed.